In a world increasingly focused on sustainability and mindful living, the idea of transforming what we usually discard into something delicious and productive is nothing short of revolutionary. Imagine turning your leftover coffee grounds, stale bread, or even old cardboard into a thriving ecosystem that yields fresh, gourmet mushrooms. This isn’t a far-fetched dream; it’s an achievable reality that blends the principles of permaculture with the joys of homegrown produce.
Growing mushrooms from kitchen scraps is more than just a fascinating experiment; it’s a powerful step towards reducing food waste, embracing a circular economy within your home, and enjoying a consistent supply of nutritious, earthy fungi. Beyond the environmental benefits, it’s an incredibly rewarding hobby that connects you more deeply with the natural cycles of growth and decay.
This comprehensive guide will walk you through the exciting journey of cultivating mushrooms using everyday kitchen waste. We’ll explore the best scraps to use, the types of mushrooms that thrive in these conditions, and a detailed, step-by-step process to ensure your success. Get ready to unlock the hidden potential of your kitchen discards and embark on a unique, delicious, and sustainable adventure!
Why Grow Mushrooms from Kitchen Scraps? The Benefits Beyond the Bounty
Before we dive into the how-to, let’s solidify why this endeavor is so worthwhile. The advantages extend far beyond simply having fresh mushrooms for dinner:
- Food Waste Reduction: This is arguably the most significant benefit. Globally, an immense amount of food is wasted annually. By diverting organic kitchen scraps like coffee grounds, cardboard, and sawdust away from landfills, you actively participate in reducing this waste, transforming it into a valuable resource.
- Sustainable Living: Growing your own food, especially in a way that repurposes waste, is a cornerstone of sustainable living. It lessens your reliance on commercially produced goods, reduces your carbon footprint (no packaging, no transportation), and fosters a more self-sufficient household.
- Cost Savings: While the initial investment in spores or spawn might be modest, the long-term savings are considerable. Fresh gourmet mushrooms can be expensive at the grocery store. Growing them at home means you’ll have a steady, free supply.
- Nutrient-Rich Food Source: Mushrooms are packed with vitamins, minerals, and antioxidants, offering a healthy addition to your diet. Knowing exactly how they were grown gives you peace of mind about their purity.
- Educational and Rewarding: The process is a fantastic learning experience, especially for families. Witnessing the life cycle of fungi from mycelial growth to fruiting bodies is captivating. The satisfaction of harvesting your own homegrown mushrooms is immensely rewarding.
- Unique Flavor and Freshness: Homegrown mushrooms often boast a superior flavor and texture compared to their store-bought counterparts, picked fresh at their peak.
Choosing Your Champions: Best Scraps and Mushroom Varieties
Not all kitchen scraps are created equal when it comes to mushroom cultivation. Fungi are decomposers, and they thrive on lignocellulosic materials – plant matter rich in lignin and cellulose.
Top Kitchen Scraps for Mushroom Growth:
- Coffee Grounds: A superstar substrate! Spent coffee grounds are pasteurized during the brewing process, reducing contamination risk, and are rich in nitrogen, which many mushroom species love. Collect them daily and dry them out slightly to prevent mold before use.
- Cardboard: Unwaxed, unprinted cardboard (like delivery boxes or toilet paper rolls) is an excellent carbon source. Shred it into small pieces for better colonization.
- Sawdust/Wood Shavings: If you have a woodworking hobby or access to untreated wood waste (avoid treated lumber), this is a fantastic substrate. Look for hardwoods like oak, maple, or alder.
- Straw/Hay: While not strictly “kitchen scraps” for everyone, leftover straw from gardening or pet bedding can be pasteurized and used.
- Newspaper (Limited Use): Use sparingly due to ink content, but small amounts of shredded newspaper can be incorporated into mixes.
- Bread Crumbs/Flour (As Supplements): While not primary substrates, small amounts of dried bread crumbs or flour can be added as a nutritional boost (nitrogen source) to other bulk materials.
Important Note on Scraps: Always ensure your scraps are free from grease, oil, detergents, or any chemicals that could harm the mycelium or introduce unwanted contaminants. It’s also crucial to prevent your scraps from becoming moldy before inoculation, as this introduces competitive organisms.
Mushroom Species That Love Kitchen Scraps:
Certain mushroom species are more forgiving and vigorous growers, making them ideal for beginners using kitchen waste.
- Oyster Mushrooms (Pleurotus ostreatus & varieties): These are by far the most popular and easiest to grow. They are incredibly versatile decomposers and thrive on a wide range of substrates, including coffee grounds, straw, and cardboard. Their rapid growth and prolific fruiting make them a favorite. Varieties like Pearl Oyster, Blue Oyster, and Pink Oyster are all excellent choices.
- Lion’s Mane (Hericium erinaceus): While slightly more demanding than oysters, Lion’s Mane can also be grown on coffee grounds and hardwood sawdust. Known for its unique appearance and delicate, seafood-like flavor, it’s a rewarding challenge.
- Shiitake (Lentinula edodes): Traditionally grown on hardwood logs, some newer strains of Shiitake can be cultivated on supplemented sawdust or coffee grounds, though they might require more patience.
Where to Get Mushroom Spawn: You’ll need “spawn” – a substrate (like grain or sawdust) that has been colonized by mushroom mycelium. You can purchase mushroom spawn kits online from reputable suppliers. This is your “seed” for growing new mushrooms.
Related: How to grow potatoes: use very large pots, fertile soil, and compost.
The Process: Step-by-Step Mushroom Cultivation from Scraps

Growing mushrooms from kitchen scraps involves several key stages. Patience and attention to detail are your best allies.
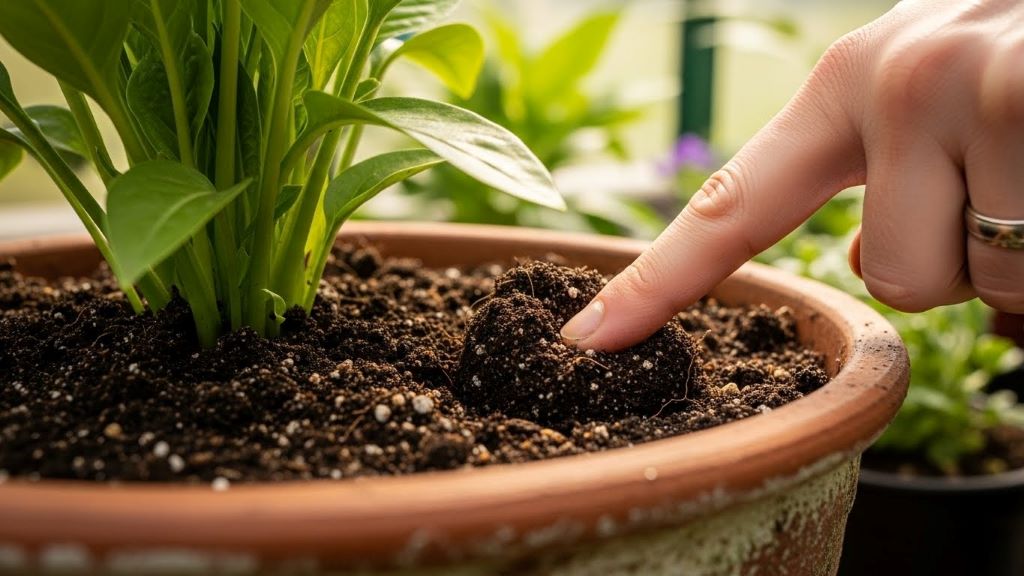
Step 1: Gathering and Preparing Your Substrate
This is where your kitchen scraps come into play.
- Collect and Dry Coffee Grounds: Collect spent coffee grounds daily. Spread them out on a tray or old newspaper to air dry for a day or two. This reduces moisture content and prevents mold growth before inoculation. You want them slightly damp, not soaking wet.
- Shred Cardboard: Tear or shred clean, unwaxed cardboard into small pieces (approx. 1-2 inches).
- Combine and Hydrate (If Necessary): For best results, a mix of different scraps often works well (e.g., 70% coffee grounds, 30% shredded cardboard). The substrate needs to be hydrated to the “field capacity” – meaning when you squeeze a handful, a few drops of water come out, but not a steady stream. If your coffee grounds are already at this consistency, you might not need to add much water. For dry cardboard, soak it overnight and then drain thoroughly.
- Pasteurization/Sterilization (Crucial Step): While coffee grounds are somewhat pasteurized by brewing, other scraps and combinations benefit from further pasteurization to kill off competing molds and bacteria.
- Hot Water Bath: Place your mixed substrate in a heat-resistant container (e.g., a large pot or a clean bucket with a lid). Pour boiling water over it until submerged. Let it sit for 1-2 hours. Drain thoroughly.
- Oven Baking: Spread your substrate on a baking tray. Bake at 200°F (93°C) for 2-3 hours. Let it cool completely before the next step.
- Microwave: For smaller batches, microwave damp substrate in a microwave-safe container for 5-10 minutes on high. Let cool.
Why Pasteurize? This step significantly reduces the chance of contamination from other fungi or bacteria that would compete with your desired mushroom mycelium, leading to failure.
Step 2: Inoculation – Introducing the Mycelium
Once your substrate has cooled completely (this is critical – hot substrate will kill the spawn!), it’s time to introduce your mushroom spawn.
- Cleanliness is Key: Sanitize your hands, tools, and the work surface with rubbing alcohol. You want to minimize introducing airborne contaminants.
- Break Apart the Spawn: Gently break up the mushroom spawn block into smaller pieces.
- Mix with Substrate: In a clean container, thoroughly mix the broken-up spawn with your prepared, cooled substrate. Aim for a ratio of about 10% spawn to 90% substrate by volume. The more spawn you use, the faster colonization typically occurs.
- Pack into Containers: Transfer the inoculated substrate into clear, breathable containers. Ideal containers include:
- Grow Bags: Specialized bags with filter patches for gas exchange.
- Plastic Tubs/Buckets: Drill small holes (1/4 inch) around the sides and bottom for air exchange.
- Large Plastic Bottles: Cut off the top, pack with substrate, and poke holes.
- Mesh Laundry Bags: For simple, breathable setups.
Pack the substrate firmly but not overly dense. Leave some airspace at the top.
Step 3: Incubation – The Waiting Game
This is where the magic happens, but it’s mostly unseen. The mycelium will colonize the substrate.
- Environment: Place your inoculated containers in a dark, warm (68-75°F / 20-24°C) place. A cupboard, closet, or dedicated grow tent works well. Avoid direct sunlight.
- Humidity: While in the colonization phase, humidity isn’t as critical as during fruiting, but don’t let the substrate dry out. The holes in your container allow for some gas exchange.
- Patience: This phase can take anywhere from 1-4 weeks, depending on the mushroom species, spawn vigor, and substrate. You’ll know it’s working when you see white, thread-like growth (mycelium) spreading throughout the substrate. It should eventually fully colonize the block, appearing as a solid white mass.
Troubleshooting Incubation:
- Green/Black Mold: This is contamination. The most common culprits are inadequate pasteurization or unsanitary inoculation. Unfortunately, if you see significant mold, it’s often best to discard the contaminated block (compost it responsibly) and start over with improved sanitation.
- No Growth: The substrate might be too dry, too wet, or the temperature is too low/high. Review your conditions.
Step 4: Fruiting – Bringing Them to Life
Once the substrate is fully colonized, it’s time to trigger fruiting – the formation of mushrooms. This requires a change in environmental conditions.
- Light: Move your colonized block to a location with indirect light. A window with ambient light (not direct sun) is fine. Mushrooms don’t photosynthesize, but light acts as a cue for fruiting.
- Temperature: Reduce the temperature slightly, typically to 60-70°F (15-21°C), depending on the species. Check specific requirements for your chosen mushroom.
- Humidity (CRITICAL!): This is the most crucial factor for fruiting. Mushrooms are mostly water, and they need high humidity (85-95%) to form.
- Fruiting Chamber: The easiest way to achieve this is by creating a simple fruiting chamber. A clear plastic storage tub with a lid works perfectly. You can add a layer of perlite (soaked in water) at the bottom to increase humidity.
- Misting: Mist the inside walls of your fruiting chamber and around the mushroom block (avoid misting directly on the pins) multiple times a day with a spray bottle filled with clean water.
- Fresh Air Exchange (FAE): While humidity is high, you also need fresh air. Mushrooms “breathe” oxygen and exhale carbon dioxide.
- Ventilation: For fruiting chambers, open the lid a few times a day for several minutes to exchange the air. If using bags, snip small “X” cuts in the bag where you want the mushrooms to fruit and fan them daily. If using buckets, the drilled holes provide some FAE.
Within a few days to a week after initiating fruiting conditions, you should start to see tiny “pins” – miniature mushrooms – emerging from the substrate.
Step 5: Harvesting Your Bounty
Once the mushrooms grow to a desirable size, it’s time to harvest.
- When to Harvest: For most oyster mushrooms, harvest when the edges of the caps begin to flatten or curl slightly upwards. For Lion’s Mane, harvest when the spines are well-formed and elongated, but before they start to brown.
- How to Harvest: Gently twist and pull the mushroom cluster at its base, or use a sharp, clean knife to cut them off as close to the substrate as possible. Try not to damage the underlying mycelium.
- Multiple Flushes: Your mushroom block can often produce multiple “flushes” or harvests. After the first flush, you might need to re-hydrate the block by soaking it in cold water for a few hours (or even overnight for larger blocks) before returning it to fruiting conditions for the next flush. You can often get 2-4 flushes, though subsequent flushes tend to be smaller.
Related: How to Harvest in Stardew Valley: A Complete Guide for Beginners
Common Pitfalls and Troubleshooting
- Contamination: The most common issue. Prevention is key:
- Sterilize/Pasteurize thoroughly: This cannot be stressed enough.
- Maintain Cleanliness: Sanitize everything that touches your substrate and spawn.
- Use Fresh Scraps: Don’t use pre-moldy kitchen waste.
- No Fruiting:
- Insufficient Fresh Air Exchange (FAE): CO2 buildup can inhibit pinning. Increase ventilation.
- Low Humidity: Increase misting or improve your fruiting chamber setup.
- Incorrect Temperature/Light: Ensure conditions match your mushroom species’ requirements.
- Mycelium Not Fully Colonized: Be patient. Wait until the block is entirely white.
- Leggy/Stunted Mushrooms:
- Too Much CO2/Insufficient FAE: Mushrooms will “reach” for air, resulting in long stems and small caps. Increase ventilation.
- Not Enough Light: Some species need ambient light to develop proper caps.
- Dry Caps/Cracked Caps:
- Too Low Humidity: Increase misting.
Beyond the Harvest: Using Your Homegrown Mushrooms
Once you’ve successfully harvested your beautiful homegrown mushrooms, the culinary possibilities are endless!
- Immediate Use: Enjoy them fresh in stir-fries, soups, omelets, pastas, or as a simple sautéed side dish. Their fresh flavor will be unparalleled.
- Storage: Store fresh mushrooms in a paper bag in the refrigerator for up to a week. Avoid plastic bags, which trap moisture and lead to spoilage.
- Preservation:
- Dehydrating: Slice mushrooms and dry them in a dehydrator or a low oven until crispy. Store in airtight containers. Rehydrate by soaking in warm water.
- Freezing: Sauté mushrooms first, then freeze them in a single layer on a baking sheet before transferring to freezer bags.
- Pickling: A delicious way to preserve mushrooms and add a tangy flavor.
Related: Cultivate Crispness: Your Ultimate Guide to Growing a Year-Round Indoor Salad Garden
Conclusion: A Journey into Sustainable Self-Sufficiency
Growing mushrooms from kitchen scraps is more than just a novel gardening project; it’s a powerful statement about resourcefulness, sustainability, and connection to nature. By transforming your everyday waste into gourmet food, you not only reduce your environmental footprint but also gain a deeper appreciation for the intricate processes of the natural world.
This endeavor requires a little patience and attention to detail, but the rewards are bountiful – fresh, delicious, and healthy mushrooms, a greener home, and the immense satisfaction of knowing you’ve cultivated something incredible from what others might simply discard. So, gather your coffee grounds, embrace the magic of mycelium, and embark on this exciting journey. Your kitchen, and the planet, will thank you for it!